
Getting started
create-keystone-app is a CLI app that makes it easier for you to get started with Keystone.
It will generate a couple of files for you and install all the dependencies you need to run the Admin UI and start using the GraphQL API.
Quick Start
yarn create keystone-appcd my-appyarn dev
Installing your own Keystone instance
Open your preferred shell and make sure you are in the folder you would like to create your new project in.
create-keystone-app will generate a new folder with your new Keystone files in it.
Yarn
Use yarn create:
cd your/path/yarn create keystone-app
npm
Use npm init:
cd your/path/npm init keystone-app
npm init "<initializer>" is available in npm 6+
npx
Use npm's npx:
cd your/path/npx create-keystone-app
npx comes with npm 5.2+
Connecting your database
The CLI will ask you to name your new app and for a way to connect to your database.
Make sure you have your connection URL ready for your database, e.g. postgres://localhost/my-app or postgres://username:password@localhost/my-app.
If you installed PostgreSQL on MacOS with Postgres.app or Homebrew, you'll probably want to use the default user it created for you like this: postgres://my-username@localhost/my-app
If you run into trouble with the database, check out this guide on Database Setup
Opening your shiny new Admin UI
After running create-keystone-app you can now cd into the folder that was created for you and start Keystone.
cd my-appyarn dev
This will generate the Admin UI pages via Next.js on http://localhost:3000.
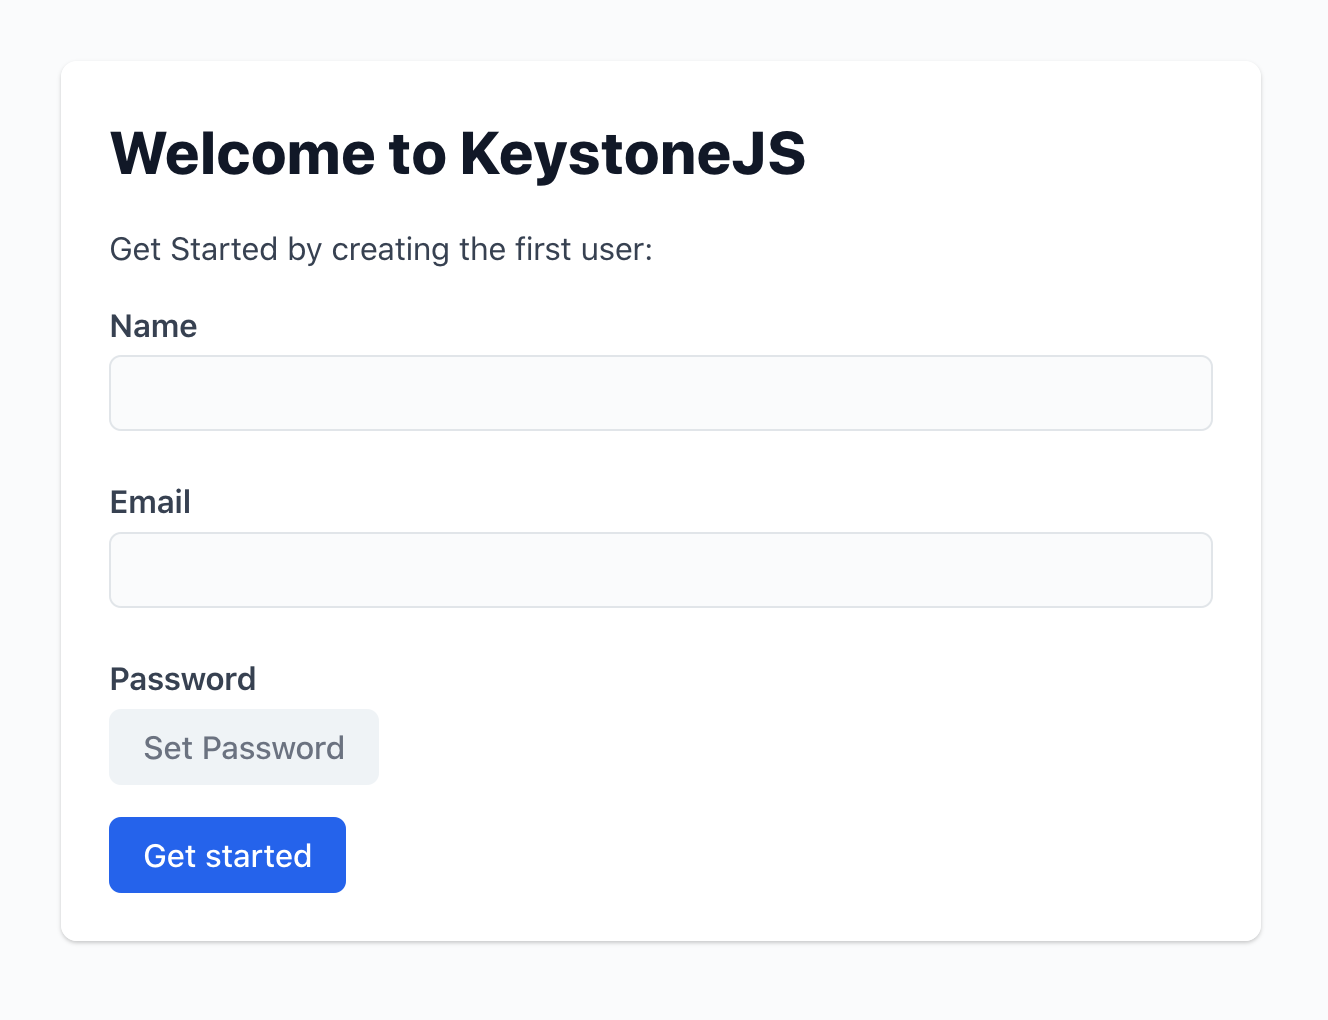
When you visit the Admin UI for the first time you will be presented with a handy screen that asks you to create a user. Go ahead and create your first user. The email address and password will be used as the login details when you next need to login to the Admin UI.
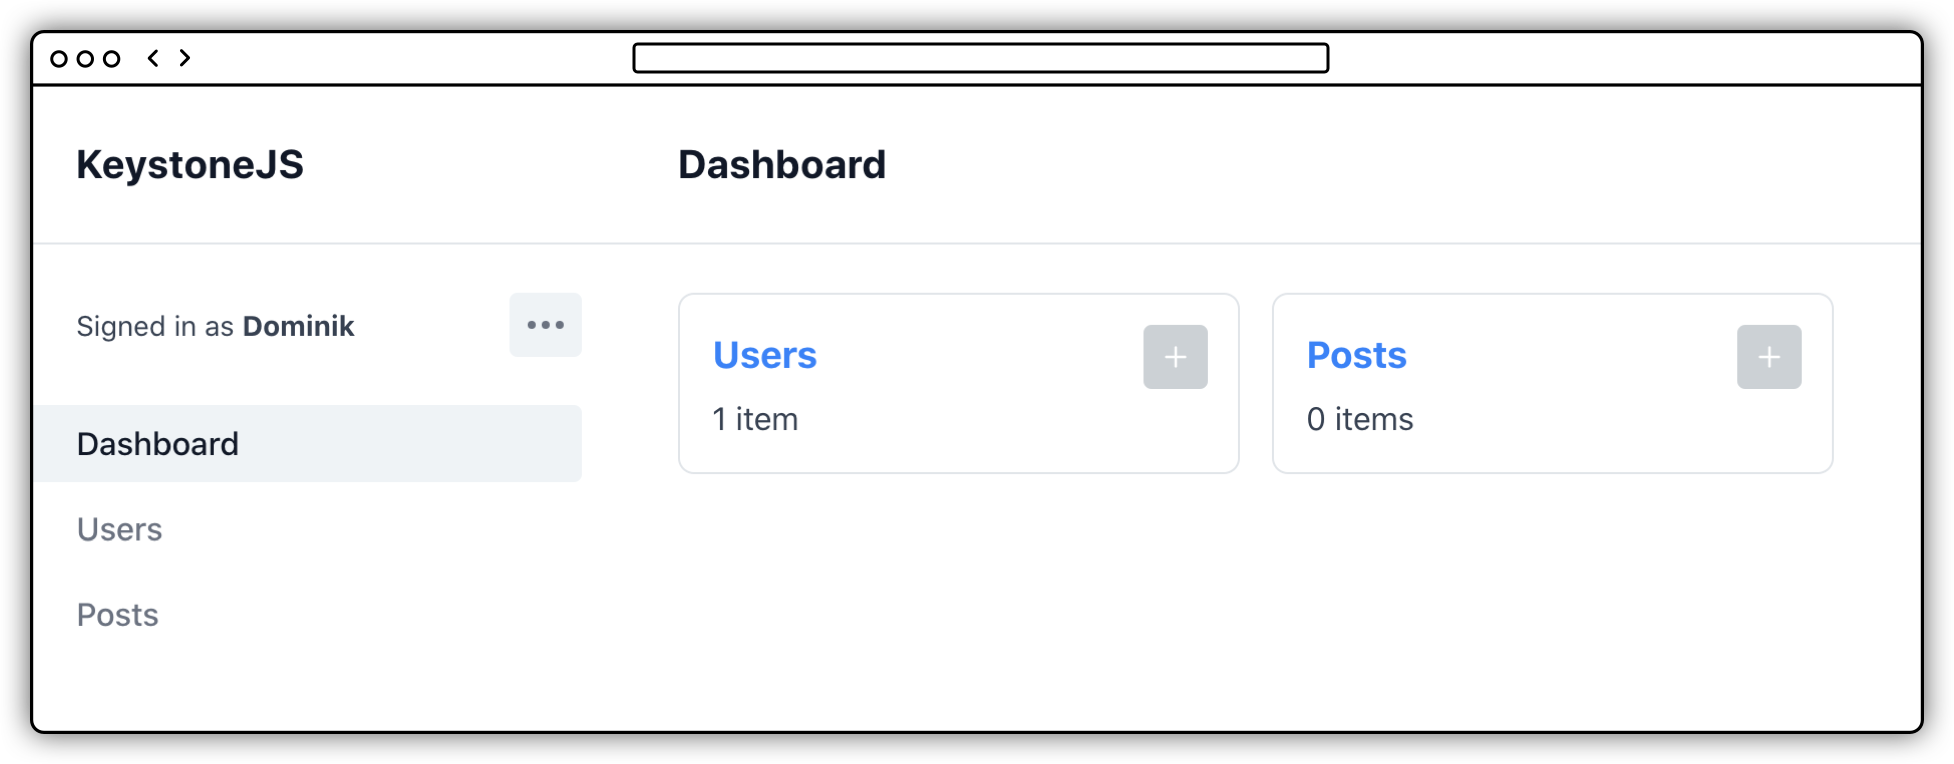
Once you've created the user you can see your new Keystone Admin UI that comes with two visible lists. You can use the Admin UI to explore and interact with the data in your system.
Output
We now have some files in the newly generated folder. The two most important once you want to get into are keystone.ts and schema.ts.
.├── keystone.ts # The main entry file for Keystone├── node_modules # Your dependencies├── package.json # Your package.json with three scripts prepared for you├── schema.ts # The schema of your data├── tsconfig.json # Your typescript config└── yarn.lock # And finally your yarn lock file
Scripts
The files come with three npm scripts you can run locally.
dev
- The
devscript will run Keystone in development mode. Jump over to http://localhost:3000 to see your Admin UI.
build
- The
buildscript will build the project and is required to be run beforestart.
start
- The
startscript will run Keystone in production mode.
Read more about the cli in our command line guides.
Where to next?
- Customise Keystone with the System Configuration API.
- Add fields and relationships using Schema API.